Don’t bypass a faulty brake failure switch. Gary Stretton shows how to ensure your dual-circuit brakes will work when you need them most
Land Rover Monthly
GARY STRETTON
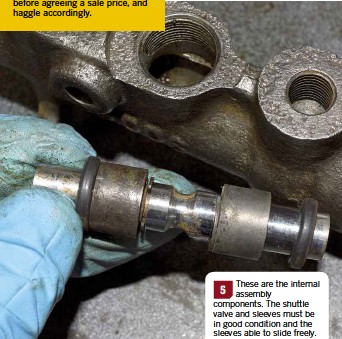
These are the internal assembly components. The shuttle valve and sleeves must be in good condition and the sleeves able to slide freely.
Making sure your Series III stops safely
he pressure differential warning actuator (PDWA) fitted to Series III vehicles gets an unfair reputation, in my opinion. Its purpose is to offer a fail-safe method of bringing a Land Rover fitted with dual-circuit brakes to a halt, should the braking system suffer rapid fluid loss and therefore operating pressure.
It does this by splitting the braking system between front and rear, providing braking capacity in an emergency failure by shutting off the faulty half of the system. Given the weight and momentum our vehicles are capable of achieving, it’s a fail-safe I welcome.
The PDWA, or brake failure switch, as it’s more commonly known, is a simple mechanism in need of sympathetic understanding. Some uninformed forum posts tell of ditching a faulty valve and replacing it with a multi-connector. This only serves to create a single line braking system so that, if the system suffers catastrophic fluid loss, only an ejector seat will save you. Not a scenario you want on your conscience. Misunderstandings concerning the PDWA perhaps stem from a lack of repair kits and not knowing the correct method for bleeding the dual-circuit brake system. The good news is that both of these are DIY friendly.
There are at least three variations on
Tthe PDWA valve fitted to Series vehicles. For example, some versions include a plunger ball for the switch, and a twopiece valve (as shown in the SIII workshop manual). The valve shown here is the single-piece valve without plunger ball, which is fitted to some SIII civilian and military models, and the 101 Forward Control. So be guided by the internals you find when the valve is dismantled. The inspection and rebuild procedure is similar for all types. I couldn’t find a service kit for my valve but, if you do, be wary of New Old Stock (NOS) kits. Aged rubber O-rings still deteriorate in storage, so source new rubber items, regardless.